


Running this Quest
You can adjust any of the information below according to your campaign, preference or imagination. Feel free to experiment and let other visitors know what works for you in the comments below.
Objective
The objective of the quest is to unlock the grand door to the Elemental Sanctum by solving four elemental puzzles, each corresponding to earth, air, fire, or water. The adventurers must explore the chamber, observe the clues presented, and demonstrate their understanding of the elements to overcome each challenge. As they solve each puzzle, the corresponding lock on the door will unlock, leading them closer to the treasures hidden within.
Earth Puzzle: "The Harmonic Foundation"
The party enters a grand chamber pulsating with the essence of the earth element. In the center stands a sturdy stone pedestal, weathered by the ages, adorned with differently shaped stones representing the diverse elements found within the earth. The adventurers notice written words etched on the pedestal and inscribed on the walls: foundation, stability, balance, precision, focus, adaptability, and harmony. As they study the clues, they realize that achieving a perfect balance of these qualities is the key to solving the Earth Puzzle.
To solve the Earth Puzzle, the players must rearrange the stones on the pedestal, considering the written clues and the inherent qualities they represent. Here’s an example of how the puzzle could be solved:
- Foundation: The adventurers identify the heaviest stone, a large boulder with a rough surface. They intuitively place it at the bottom of the pedestal, providing a stable foundation.
- Stability and Balance: Next, they search for a medium-sized stone with a flat, circular shape. Recognizing its symbolism of stability and balance, they position it in the center of the pedestal, above the large boulder, creating a sense of equilibrium.
- Precision and Focus: The players then search for a small, smooth stone with a pointed tip. Realizing its significance in representing precision and focus, they carefully place it atop the circular stone, creating a sense of purpose and direction.
- Adaptability and Harmony: Finally, the adventurers look for a uniquely shaped stone, one that fits snugly into the gaps left by the other stones. Understanding its symbolism of adaptability and harmony, they position it with precision, completing the arrangement and achieving a perfect balance.
As the last stone settles into place, the written words on the pedestal and walls light up one by one, emphasizing the elements of the solution.
The earth beneath the adventurers’ feet rumbles gently, and the stone pedestal emits a soft glow. The Earth lock on the door releases.
Air Puzzle: "Whispers of the Zephyr"
Before them hangs a series of wind chimes, each inscribed with an intricate riddle related to air. The adventurers must decipher the riddles, activating the chimes in the correct order to harness the power of the air element.
The Air puzzle presents a series of intricately designed wind chimes hanging from thin chains. Each wind chime is crafted with delicate glass or hollow metal tubes, suspended at different heights. The chimes bear engraved patterns of swirling winds, clouds, and feathers, complementing their elegant craftsmanship. As a breeze passes through the chamber, the chimes emit soft, melodic sounds. Each chime has an engraved riddle related to air or wind, written in flowing calligraphy.
The players must determine the correct order to activate the chimes. Once the chimes are activated in the correct order, the Air lock on the door will unlock, granting access to the next stage.
- Riddle 1: “Born from whispers in the breeze, I bring clarity amidst the trees.”
- Riddle 2: “A gentle zephyr, a whispering sound, I’m the breath that travels around.”
- Riddle 3: “From the east, I gust and blow, carrying secrets as I go.”
- Riddle 4: “With wings unseen, I soar on high, a force that paints the open sky.”
To solve the Air Puzzle, follow these steps:
- Carefully read the riddles inscribed on each wind chime.
- Analyze the hints within the riddles to determine the order in which the chimes should be activated.
- Pay attention to keywords or clues that hint at a specific sequence or arrangement.
- Experiment by activating the chimes in different orders based on your interpretations of the riddles.
The correct order of activating the wind chimes is as follows:
- Chime 2: The riddle suggests a gentle zephyr and whispering sound, signifying a soft breeze. This chime represents the initial stage of the air element, symbolizing the calm before a storm.
- Chime 4: The riddle describes a force that soars on high and paints the open sky, symbolizing a powerful and soaring wind. Activating this chime represents the culmination of the air element’s might.
- Chime 1: The riddle speaks of clarity amidst the trees, implying a gentle breeze that clears the air. Activating this chime follows the progression from the initial stage, indicating a building up of the air element’s power.
- Chime 3: The riddle hints at a gust coming from the east, indicating a stronger wind that carries secrets. This chime represents the intensification of the air element’s force.
As the adventurers activate the wind chimes in the correct order, a melodic harmony fills the chamber. A gust of wind whisks through the room, unlocking the Air lock on the door.
Fire Puzzle: "Inferno's Dance"
As the adventurers approach the Fire Puzzle, they are greeted by a mesmerizing sight. Along the chamber’s walls, a row of unlit torches is mounted on ornate brackets, waiting to be ignited. The torches stand tall, their dark wrought iron brackets intricately shaped to resemble graceful flames frozen in mid-motion. It’s a testament to the skilled craftsmanship of a bygone era.
Each torch in the row bears unique markings and symbols, subtly engraved onto their surfaces. These symbols indicate the position and order within the puzzle, holding the key to unlocking its secrets. As the adventurers examine the torches, they discover the following symbols:
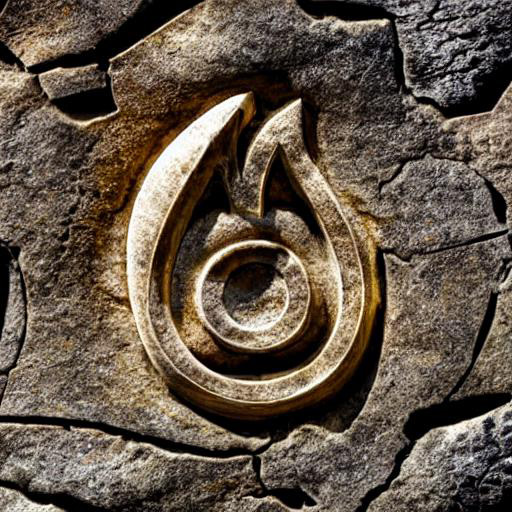
- Torch 1: A flame engulfing a circle.
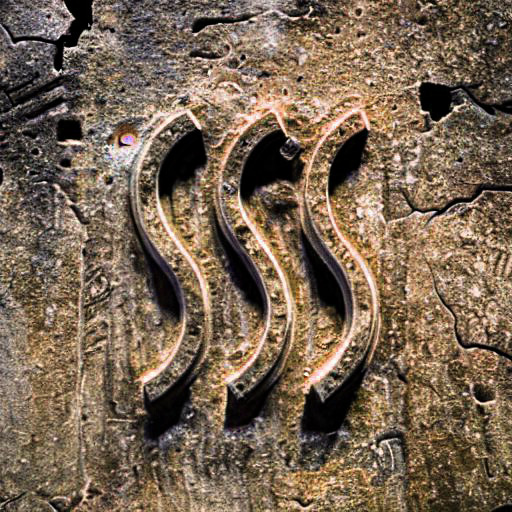
- Torch 2: Three wavy lines rising upwards.
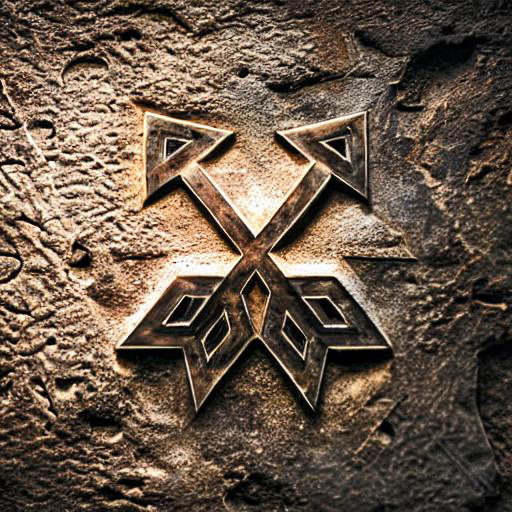
- Torch 3: Two crossed arrows, resembling a fiery X.
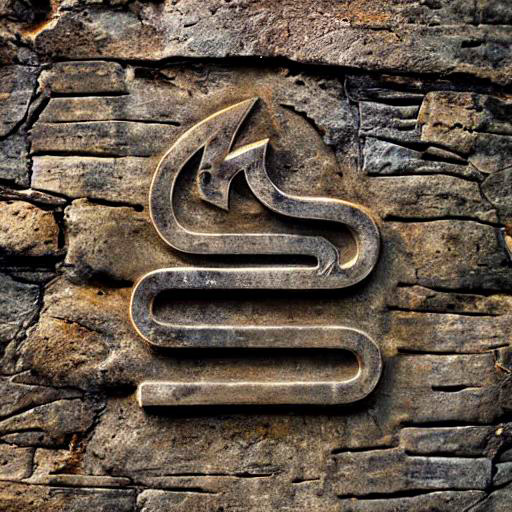
- Torch 4: A serpentine coil with a small flame at its tip.
To solve the Fire Puzzle, the adventurers must ignite the torches in the correct sequence, harnessing the elemental power of fire. If one of the torches is not lit in the correct order, all torches will extinguish themselves after the fourth torch is lit, and a wave of intense heat engulfs the room, causing fire damage to the adventurers. With each incorrect guess, the temperature in the chamber rises, intensifying the challenge they face (see below).
The correct order of lighting the torches is as follows:
- Light Torch 2 first, represented by the three wavy lines rising upwards. This symbolizes the initial spark, the beginning of a flame’s journey.
- Proceed to light Torch 1, with the flame engulfing a circle symbol. This signifies the growing intensity of the fire, as it consumes and expands.
- Move on to Torch 4, characterized by the serpentine coil with a small flame at its tip. This symbolizes the winding and swirling motion of fire, reaching its peak intensity.
- Finally, ignite Torch 3, the torch bearing two crossed arrows resembling a fiery X. This represents the culmination of fire’s power and energy.
As the adventurers follow this precise sequence and each torch is ignited, the flames respond with a burst of brilliance. The chamber is filled with the radiant glow and flickering shadows, a visual affirmation that the puzzle has been solved.
Incorrect guess
If the adventurers make an incorrect guess and light the torches in the wrong order, a wave of intense heat engulfs the room. The temperature rises significantly, causing fire damage to the adventurers. The damage inflicted can be determined by rolling dice.
For example, you can have each adventurer roll a d6, with the resulting number representing the amount of fire damage they take. Adjust the dice type and damage scale based on the level and difficulty of your campaign.
With each subsequent incorrect guess, the temperature continues to climb, making it increasingly challenging to stay focused and solve the puzzle.
As the last torch is ignited in the correct sequence, the flames respond with a burst of brilliance, filling the chamber with a radiant glow. The room becomes alive with dancing shadows and the warm, vibrant light of the now-lit torches. The Fire lock on the door clicks open.
Water Puzzle: "Enchanted Depths"
As the adventurers explore the chamber, their attention is drawn to a tranquil pool of shimmering water that occupies the center of the room. The water’s surface reflects a myriad of colors, creating a captivating display and gives off an air of magic. The air is filled with a sense of mystery and anticipation, as if the water holds a secret to be uncovered.
The adventurers investigate the pool and discover its enchantment: anyone who touches or inspects the water becomes trapped within its waves, slowly being pulled down into the depths. The rest of the party must act swiftly to save their comrade from being submerged.
To add a sense of urgency and challenge, the trapped adventurer should have a limited amount of time before their life is at risk. You can adjust the time frame based on the desired difficulty level of the puzzle and the capabilities of your party. Here’s an example:
The trapped adventurer’s life hangs in the balance as the water rapidly rises around them. They have only a few minutes before the water reaches a critical level, putting them at risk of drowning. The party must act swiftly and decisively to solve the puzzle, rescue their companion, and escape the room before it’s too late.
Feel free to adjust the time frame to match the intensity of the situation and the capabilities of your party.
To solve the Water Puzzle and rescue their trapped companion, the adventurers must follow these steps:
- Notice the Lever: The party observes the lever or switch positioned near the pool, realizing that it may have a significant role in their rescue attempt.
- Activate the Lever: One of the adventurers quickly pulls the lever or flips the switch. As they do so, the water in the pool starts to drain, lowering not only their trapped team member, but the water level, leaving their fellow adventurer trapped at the bottom of the now empty pool.
- Reach the Trapped Companion: With the water receding, the remaining party members rush to the exposed area and extend a helping hand or use a rope to pull their trapped comrade to safety. Time is of the essence, as the water will begin to rise again.
With a collective effort, the party solves the water puzzle, releasing their trapped comrade from the clutches of the enchanted pool. Relief fills the room as they rejoice in their success. The Water lock on the door unlocks,
Once all Puzzles are Solved
Once all the puzzles in the Elemental Sanctum are successfully solved, a sense of fulfillment and accomplishment fills the chamber. The locked door at the far end of the room slowly swings open, revealing a path that leads deeper into the Sanctum.
As the adventurers step through the open door, they are greeted by a surge of elemental energy. This energy intertwines with their essence. The air feels invigorating, the fire empowers them, the water rejuvenates their spirits, and the earth strengthens their resolve.
Rewards
The adventurers discover a treasure cache hidden within the sanctum. The cache contains a valuable item that serves as a testament to their resourcefulness and triumph over the environmental puzzles. Upon successfully completing the challenges of the Elemental Sanctum, the adventurers are rewarded with a set of Elemental Medallions.
Homebrew
Elemental Medaillion
Uncommon – Wondrous Item
Properties requires attunement
Value 3000 GP per medallion
These medallions are beautifully crafted pendants, each adorned with a symbol representing one of the four elements: air, fire, water and earth. When worn each Elemental Medallion grants the wearer a minor elemental boon related to its respective element.
Effects
- Medallion of Zephyr (Air):
While wearing the Medallion of Zephyr, the wearer gains a slight increase in movement speed, granting them a +5 feet bonus to their movement. - Medallion of Ember (Fire):
The Medallion of Ember enhances the wearer’s offensive capabilities. It adds a +1 bonus to the damage rolls of fire-related spells and attacks. - Medallion of Cascades (Water):
Wearing the Medallion of Cascades grants the wearer the ability to breathe underwater for up to 1 hour, allowing them to explore aquatic environments without the need for magical aid. - Medallion of Terra (Earth):
The Medallion of Terra grants the wearer enhanced stability and resilience. It provides advantage on saving throws against effects that would knock them prone or move them forcefully.
The Elemental Medallions serve as a symbol of the adventurers’ triumph over the elemental challenges and provide small but useful bonuses tied to each element. They can be worn individually or as a set, allowing the adventurers to tailor their bonuses to suit their needs and preferences.
Note: The specific mechanics and bonuses of the Elemental Medallions can be adjusted to suit the balance and power level of your campaign.
Conclusion
Having overcome the environmental puzzles and claimed their rewards, the adventurers stand within the Elemental Sanctum, their pockets and hearts filled with the power of the elements. They now possess the tools to face greater challenges, with newfound knowledge and abilities that can shape the course of their future adventures. As they exit the sanctum, the party carries with them the whispers of the ancients and the legacy of the elemental forces that they have mastered.

Puzzles are well thought out and were a ton of fun.